Difference between revisions of "Yoshida Anime Nerd"
Jump to navigation
Jump to search
| (9 intermediate revisions by the same user not shown) | |||
| Line 1: | Line 1: | ||
| − | |||
: ''See Also: [[Custom Costumes]], [[Events#Event_Costume_Hats|Event Costumes]], [[Collector Kiki]], [[Vada Optician]], [[Gwenivere Wigs]], [[Nicolas Flamel Biochemistry]]'' | : ''See Also: [[Custom Costumes]], [[Events#Event_Costume_Hats|Event Costumes]], [[Collector Kiki]], [[Vada Optician]], [[Gwenivere Wigs]], [[Nicolas Flamel Biochemistry]]'' | ||
| + | [[File:Yoshida.png|right]] | ||
<center>[[File:Yoshida.gif]] | <center>[[File:Yoshida.gif]] | ||
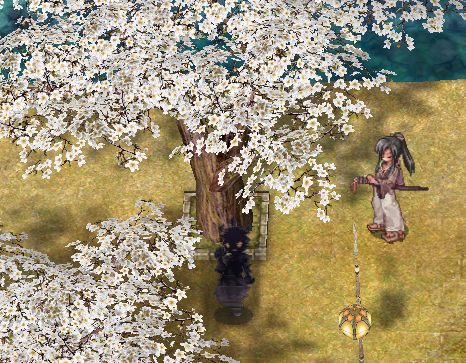
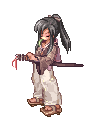
'''Yoshida''' | '''Yoshida''' | ||
{{Navi|amatsu|103|168}}</center> | {{Navi|amatsu|103|168}}</center> | ||
| − | + | If you're feeling a little itch to cosplay, you've really gotta come find Yoshida-kun.<br> | |
| + | His current inventory is more full of the popular anime stuff but maybe that will change soon! | ||
| + | : ''[[File:ic.png|30px]] '''Dyestuffs''' in all colors can be found in '''{{item |id=644 Gift Box}}es''', which can be found easily with the use of '''{{item |id=4206 Myst Case Card}}''' in your headgear slots.'' | ||
| + | :: '''''Piamette''' respawns every hour on last kill!'' | ||
== Quest Shop Panel 1 == | == Quest Shop Panel 1 == | ||
: ''[[File:ic.png|30px]] All Costumes from this panel are Upper equipment locations.'' | : ''[[File:ic.png|30px]] All Costumes from this panel are Upper equipment locations.'' | ||
| − | + | {|class="wikitable" style="font-size:smaller; margin:auto; width:60%;" | |
| − | {|class="wikitable" style="font-size:smaller; margin:auto;" | + | ! style="text-align: center; font-weight:bold; font-family:Arial, Helvetica, sans-serif !important;; background-color:#A88799; width: 10%;" | Image |
| − | ! style="text-align: center; font-weight:bold; font-family:Arial, Helvetica, sans-serif !important;; background-color:#A88799; width: | + | ! style="text-align: center; font-weight:bold; font-family:Arial, Helvetica, sans-serif !important;; background-color:#A88799; width: 25%;" | Name |
| − | ! style="text-align: center; font-weight:bold; font-family:Arial, Helvetica, sans-serif !important;; background-color:#A88799; width: | + | ! style="text-align: center; font-weight:bold; font-family:Arial, Helvetica, sans-serif !important;; background-color:#A88799; width: 25%;" | Ingredients |
| − | ! style="text-align: center; font-weight:bold; font-family:Arial, Helvetica, sans-serif !important;; background-color:#A88799; width: | ||
|- | |- | ||
| style="text-align: center; font-family:Arial, Helvetica, sans-serif !important;; background-color:#ffffff;" | [[File:20311.png]] | | style="text-align: center; font-family:Arial, Helvetica, sans-serif !important;; background-color:#ffffff;" | [[File:20311.png]] | ||
| Line 18: | Line 20: | ||
: 200 [[File:20310s.png]] Tiger Amber* | : 200 [[File:20310s.png]] Tiger Amber* | ||
: <small>* Drops from '''Eggring''' in {{Navi|ama_test||}}. Get in there with '''Satoshi'''.</small> | : <small>* Drops from '''Eggring''' in {{Navi|ama_test||}}. Get in there with '''Satoshi'''.</small> | ||
| + | : 5 [[File:20057s.png]] [[Events|Golden Event Apple]] | ||
: 1 [[File:22554s.gif]] [[Server_Information#Custom_Currencies|Mithril Coin]] | : 1 [[File:22554s.gif]] [[Server_Information#Custom_Currencies|Mithril Coin]] | ||
|- | |- | ||
| Line 273: | Line 276: | ||
: 1 [[File:20311s.png]] [[Yoshida_Anime_Nerd#Upper|Flaming Tiger Charm]] | : 1 [[File:20311s.png]] [[Yoshida_Anime_Nerd#Upper|Flaming Tiger Charm]] | ||
|} | |} | ||
| − | |||
== Quest Shop Panel 2 == | == Quest Shop Panel 2 == | ||
: ''[[File:ic.png|30px]] All Costumes from this panel are Middle equipment locations.'' | : ''[[File:ic.png|30px]] All Costumes from this panel are Middle equipment locations.'' | ||
| − | + | {|class="wikitable" style="font-size:smaller; margin:auto; width:60%;" | |
| − | {|class="wikitable" style="font-size:smaller; margin:auto;" | + | ! style="text-align: center; font-weight:bold; font-family:Arial, Helvetica, sans-serif !important;; background-color:#A88799; width: 10%;" | Image |
| − | ! style="text-align: center; font-weight:bold; font-family:Arial, Helvetica, sans-serif !important;; background-color:#A88799; width: | + | ! style="text-align: center; font-weight:bold; font-family:Arial, Helvetica, sans-serif !important;; background-color:#A88799; width: 25%;" | Name |
| − | ! style="text-align: center; font-weight:bold; font-family:Arial, Helvetica, sans-serif !important;; background-color:#A88799; width: | + | ! style="text-align: center; font-weight:bold; font-family:Arial, Helvetica, sans-serif !important;; background-color:#A88799; width: 25%;" | Ingredients |
| − | ! style="text-align: center; font-weight:bold; font-family:Arial, Helvetica, sans-serif !important;; background-color:#A88799; width: | + | |- |
| + | | style="text-align: center; font-family:Arial, Helvetica, sans-serif !important;; background-color:#ffffff;" | [[File:19836.png]] | ||
| + | | style="text-align: center; font-family:Arial, Helvetica, sans-serif !important;;" | [[File:New-small.png]]<br>[[File:19836s.png]] '''[C] Detective Yakumo Bandage''' | ||
| + | | style="font-family:Arial, Helvetica, sans-serif !important;;" | | ||
| + | : 1 [[File:19231s.png]] [[Endless_Tower#Rewards_from_Doug|[C] Crimson Bandage]] | ||
| + | : 50 [[File:6470s.png]] Bloody Thirst* | ||
| + | : <small>* Drops from '''Biolabs Monsters''' in {{Navi|lhz_dun03||}} & {{Navi|lhz_dun04||}}</small> | ||
| + | : {{Item List |num=2 |id=982 |item=White Dyestuffs}} | ||
| + | : 1 [[File:20312s.png]] Sewing Kit* | ||
| + | : <small>* Drops from '''Piamette''' in {{Navi|ama_dun02||}}</small> | ||
| + | : 1 [[File:20311s.png]] [[Yoshida_Anime_Nerd#Upper|Flaming Tiger Charm]] | ||
|- | |- | ||
| style="text-align: center; font-family:Arial, Helvetica, sans-serif !important;; background-color:#ffffff;" | [[File:19681.png]] | | style="text-align: center; font-family:Arial, Helvetica, sans-serif !important;; background-color:#ffffff;" | [[File:19681.png]] | ||
| Line 308: | Line 320: | ||
: 1 [[File:20311s.png]] [[Yoshida_Anime_Nerd#Upper|Flaming Tiger Charm]] | : 1 [[File:20311s.png]] [[Yoshida_Anime_Nerd#Upper|Flaming Tiger Charm]] | ||
|} | |} | ||
| − | |||
== Quest Shop Panel 3 == | == Quest Shop Panel 3 == | ||
: ''[[File:ic.png|30px]] All Costumes from this panel are Lower equipment locations.'' | : ''[[File:ic.png|30px]] All Costumes from this panel are Lower equipment locations.'' | ||
| − | + | {|class="wikitable" style="font-size:smaller; margin:auto; width:60%;" | |
| − | {|class="wikitable" style="font-size:smaller; margin:auto;" | + | ! style="text-align: center; font-weight:bold; font-family:Arial, Helvetica, sans-serif !important;; background-color:#A88799; width: 10%;" | Image |
| − | ! style="text-align: center; font-weight:bold; font-family:Arial, Helvetica, sans-serif !important;; background-color:#A88799; width: | + | ! style="text-align: center; font-weight:bold; font-family:Arial, Helvetica, sans-serif !important;; background-color:#A88799; width: 25%;" | Name |
| − | ! style="text-align: center; font-weight:bold; font-family:Arial, Helvetica, sans-serif !important;; background-color:#A88799; width: | + | ! style="text-align: center; font-weight:bold; font-family:Arial, Helvetica, sans-serif !important;; background-color:#A88799; width: 25%;" | Ingredients |
| − | ! style="text-align: center; font-weight:bold; font-family:Arial, Helvetica, sans-serif !important;; background-color:#A88799; width: | ||
|- | |- | ||
| style="text-align: center; font-family:Arial, Helvetica, sans-serif !important;; background-color:#ffffff;" | [[File:19686.png]] | | style="text-align: center; font-family:Arial, Helvetica, sans-serif !important;; background-color:#ffffff;" | [[File:19686.png]] | ||
| Line 329: | Line 339: | ||
: 1 [[File:20311s.png]] [[Yoshida_Anime_Nerd#Upper|Flaming Tiger Charm]] | : 1 [[File:20311s.png]] [[Yoshida_Anime_Nerd#Upper|Flaming Tiger Charm]] | ||
|} | |} | ||
| − | |||
== Quest Shop Panel 4 == | == Quest Shop Panel 4 == | ||
: ''[[File:ic.png|30px]] All Costumes from this panel are Mixed equipment locations.'' | : ''[[File:ic.png|30px]] All Costumes from this panel are Mixed equipment locations.'' | ||
| − | + | {|class="wikitable" style="font-size:smaller; margin:auto; idth:60%;" | |
| − | {|class="wikitable" style="font-size:smaller; margin:auto;" | + | ! style="text-align: center; font-weight:bold; font-family:Arial, Helvetica, sans-serif !important;; background-color:#A88799; width: 10%;" | Image |
| − | ! style="text-align: center; font-weight:bold; font-family:Arial, Helvetica, sans-serif !important;; background-color:#A88799; width: | + | ! style="text-align: center; font-weight:bold; font-family:Arial, Helvetica, sans-serif !important;; background-color:#A88799; width: 25%;" | Name |
| − | ! style="text-align: center; font-weight:bold; font-family:Arial, Helvetica, sans-serif !important;; background-color:#A88799; width: | + | ! style="text-align: center; font-weight:bold; font-family:Arial, Helvetica, sans-serif !important;; background-color:#A88799; width: 25%;" | Ingredients |
| − | ! style="text-align: center; font-weight:bold; font-family:Arial, Helvetica, sans-serif !important;; background-color:#A88799; width: | ||
|- | |- | ||
| style="text-align: center; font-family:Arial, Helvetica, sans-serif !important;; background-color:#ffffff;" | [[File:19684.png]] | | style="text-align: center; font-family:Arial, Helvetica, sans-serif !important;; background-color:#ffffff;" | [[File:19684.png]] | ||
| style="text-align: center; font-family:Arial, Helvetica, sans-serif !important;;" | [[File:19684s.png]] '''[C] Hollow Mask''' | | style="text-align: center; font-family:Arial, Helvetica, sans-serif !important;;" | [[File:19684s.png]] '''[C] Hollow Mask''' | ||
| style="font-family:Arial, Helvetica, sans-serif !important;;" | | | style="font-family:Arial, Helvetica, sans-serif !important;;" | | ||
| − | : {{Item List |num= |id= |item=}} | + | : 1 [[File:19106s.png]] [[Vada_Optician#Quest_Shop_Panel_1|[C] Demon Eyes]] |
| − | : | + | : {{Item List |num=999 |id=7005 |item=Skull}} |
| + | : 100 [[File:6470s.png]] Bloody Thirst* | ||
| + | : <small>* Drops from '''Biolabs Monsters''' in {{Navi|lhz_dun03||}} & {{Navi|lhz_dun04||}}</small> | ||
| + | : {{Item List |num=10 |id=6269 |item=A Master's Brush*}} | ||
| + | : <small>* Drops from '''Necromancer''' in {{Navi|abbey03||}}</small> | ||
: {{Item List |num=1 |id=6220 |item=Mysterious Dyestuffs*}} | : {{Item List |num=1 |id=6220 |item=Mysterious Dyestuffs*}} | ||
: <small>* Drops from '''Evil Snake Lord''' in {{Navi|gon_dun03||}}</small> | : <small>* Drops from '''Evil Snake Lord''' in {{Navi|gon_dun03||}}</small> | ||
| + | : 1 [[File:20311s.png]] [[Yoshida_Anime_Nerd#Upper|Flaming Tiger Charm]] | ||
|} | |} | ||
| − | |||
[[Category:Costumes]] | [[Category:Costumes]] | ||
[[Category:Quests]] | [[Category:Quests]] | ||
| + | [[Category:Stuff To Do]] | ||
Latest revision as of 16:38, 13 March 2022
- See Also: Custom Costumes, Event Costumes, Collector Kiki, Vada Optician, Gwenivere Wigs, Nicolas Flamel Biochemistry


Yoshida
If you're feeling a little itch to cosplay, you've really gotta come find Yoshida-kun.
His current inventory is more full of the popular anime stuff but maybe that will change soon!
 Dyestuffs in all colors can be found in Gift Boxes, which can be found easily with the use of Myst Case Card in your headgear slots.
- Piamette respawns every hour on last kill!
Quest Shop Panel 1
- All Costumes from this panel are Upper equipment locations.
| Image | Name | Ingredients | |||||||||||||||
|---|---|---|---|---|---|---|---|---|---|---|---|---|---|---|---|---|---|

|
| ||||||||||||||||

|
| ||||||||||||||||

|
| ||||||||||||||||

|
| ||||||||||||||||

|
| ||||||||||||||||

|
| ||||||||||||||||

|
| ||||||||||||||||

|
| ||||||||||||||||

|
| ||||||||||||||||

|
| ||||||||||||||||

|
| ||||||||||||||||

|
| ||||||||||||||||

|
| ||||||||||||||||

|
| ||||||||||||||||

|
| ||||||||||||||||

|
| ||||||||||||||||

|
| ||||||||||||||||

|
|


Quest Shop Panel 2
- All Costumes from this panel are Middle equipment locations.
| Image | Name | Ingredients | |||||||||||||||
|---|---|---|---|---|---|---|---|---|---|---|---|---|---|---|---|---|---|

|
| ||||||||||||||||

|
| ||||||||||||||||

|
|


Quest Shop Panel 3
- All Costumes from this panel are Lower equipment locations.
| Image | Name | Ingredients | ||||||
|---|---|---|---|---|---|---|---|---|

|
|
Quest Shop Panel 4
- All Costumes from this panel are Mixed equipment locations.
| Image | Name | Ingredients | |||||||||
|---|---|---|---|---|---|---|---|---|---|---|---|

|
|

